The dining table is the heart of a home
Showing posts with label breakfast. Show all posts

Monday, January 31, 2011

Date and Walnut Scones


Well I have a problem and it's quite serious. I have a craving, and I really need to find a solution to satisfy my cravings. I'm addicted to scones!....*blush* I have been making scones after scones, and searched up and down for the best scone recipe because I love those scones at my workplace so much ( I believe I mentioned this many times before in my previous posts....). Since I'm going back to Melbourne next week, probably won't be coming back to Ballarat anytime soon, I need to find a recipe I can replicate at home and make scones whenever I want to.

I think I've found "The One". The scone recipe that I shared last week was great. But date and walnut? The best so far...Well I might change my mind when I come up with a new combination, but so far this one is the best for me and my hubby. Well I found out that hubby doesn't like savoury scones. But he loved these date and walnut scones. He thinks they are better that bakers delight's. I'm not sure if they are better than bakers delight's but they sure were yummy. I used the same basic recipe that I used for my savoury scones, except that I added sugar, a little bit more butter and used dates with walnuts instead. The tops stayed crispy after 1-2 days which was great, and we just put them in the microwave for about 2 mins to warm them up and they were as good as coming out fresh from the oven. Hope you like them as much as we do.


Date and Walnut Scones

Ingredients:
  • 2 cups plain flour, sifted
  • 1 tablespoon baking powder

  • 100 grams cold butter, cubed

  • 1/4 cup dates, chopped

  • 1/2 cup chopped walnuts

  • 1/3 cup sugar
  • 180mls or 3/4 cup thickened cream

  • Pinch of salt

  • Milk to glaze prior to baking

Methods:

  1. Add flour, baking powder, salt and sugar to mixing bowl. Mix well.

  2. Add in cubed butter and mix together until small clumps form. You can use hand or food processor if you have one

  3. Then add in dates and walnuts.

  4. Add in thickened cream and use a fork to mix together until the dry ingredients are moistened

  5. Pour out all the ingredients onto floured surface and lightly mix until the dough comes together. Be careful not to overmix the dough or the scones will become really hard

  6. Form a ball and cut into 6 triangles or you can use cookie cutter and cut into small rounds as well.

  7. Glaze the scones with milk before baking

  8. Bake in preheated 220 degrees celcius for 15-17 minutes until tops are browned and crunchy

  9. Serve with butter

Tips:

  • I found that my scones spread out a little bit when I baked and became a bit flat. What I noticed from this cafe at my workplace was they flipped the scones sideways halfway through baking. I will try this next time. So halfway through baking maybe after 5-6 minutes, I will try to change the position of the scones so that the sides are facing up. This might help to keep the scones tall. I have not tried this before but saw the owner of this cafe doing this and has maintained good height for their scones. =)

Wednesday, January 26, 2011

Scones take 2 - Chives, Bacon and Sundried Tomato


My second attempt on savoury scones. This time I put chives, bacon and sundried tomatoes. I tried a different recipe this time. The last one was adapted from Masterchef of which did not require butter. But I was really curious if it will make any difference with butter added as that seems to be a usual ingredient in scones. The verdict? I prefer the ones with butter in them...ahhahahaa....It just somehow tasted better, lighter, fluffier with a more crunchy top. I think it was the butter that made the difference.

You can certainly make them into sweet scones, just add 1/3 cup of sugar and cut down the salt to the dry ingredients and the rest remains the same.

Chives, Bacons and Sundried Tomatoes Scone
Ingredients:
  • 2 cups plain flour
  • 1 tablespoon baking powder
  • 90 grams cold butter, cubed
  • 1/4 cup dried chives
  • 1/4 cup diced bacons
  • 6 pieces of sundried tomatoes, chopped into small pieces
  • Pinch of salt and ground black pepper
  • 180mls or 3/4 cup thickened cream
  • Milk to glaze prior to baking

Methods:

  1. Sift flour and baking powder to mixing bowl. Add in cubed butter and mix together until small clumps form. You can use hand or food processor if you have one
  2. Then add in chives, bacons, sundried tomatoes, salt, pepper and mix well
  3. Add in thickened cream and use a fork to mix together until the dry ingredients are moistened
  4. Pour out all the ingredients onto floured surface and lightly mix until the dough comes together. Be careful not to overmix the dough or the scones will become really hard
  5. Form a ball and cut into 6 triangles or you can use cookie cutter and cut into small rounds as well.
  6. Glaze the scones with milk before baking
  7. Bake in preheated 220 degrees celcius for 15-17 minutes until tops are browned and crunchy
  8. Serve with butter

Tips:

  • Other variations: Cheese and chives ( just add one cup of cheddar cheese), cheese and olives, mediteranian ( olive, cheese, sundried tomatoes and bacon). Sweet scones: date and walnut, apricot and coconut ( use shredded coconut), etc etc. Just need to change the ingredients added and you can make a whole lot of different varieties.
  • If serving the next day, just put in microwave for 30 seconds to warm it up.
  • For plain scone: just add 1/3 cup sugar with pinch of salt. Serve with whipped cream and jam....perfect for afternoon tea.

Tuesday, January 11, 2011

Cinnamon Rolls


The weather in Melbourne has been really humid and a bit yucky the past few days. Non-stop rain. I'm sure those who live here in Australia have all heard about the flood in Brisbane. Please keep Brisbane in prayer and pray that the rain will clear away soon. For those who are living there, I pray for strength and comfort during this difficult time. It's quite a shock to the whole nation at this stage to have this flood happening but I'm sure everyone's keeping Brisbane in prayer and the sun will surely shine again after the storm.

Back to this post, I believe that if one person would claim her recipe to be the best, that will be HER. Ree, from the pioneer woman. What a genius! I tried her cinnamon rolls recipe and oh wow, they did take me up to cloud 9. It was the easiest bread I have ever made, and they were so tasty and soft. I was just so amazed I could make cinnamon rolls so easily, without using up my biceps and triceps much at all and yet the result was phenomenal.

I love this recipe. I sure am going to keep making them in the future. My husband and brother in law love them too. The only advise I'll give is to make sure you put the pre-baked rolls into a tight fitting pan, like a square pan or round pan. I put some of them on baking tray, and instead of proofing upwards, they proofed sideways. So the buns did end up flat and a little bit dry. The other batch where I put the rolls in a square pan, proofed so well and I guarantee you they were oh so soft and nice. It was not the dough's fault. It was my fault for not putting them in the correct pan. So choose a pan where you can JUST fit the rolls in, of course giving a bit of space in between the pre-baked rolls to have their final proof. When they have their final proof they'll start sticking to each other and proof upwards. I hope you understand what I'm trying to say, I do have the tendency to be unclear sometimes...=)

Instead of making the maple flavoured icing as per her recipe, because I didn't get to buy maple flavouring, I made lemon-flavoured icing. The result was still satisfying. Oh yea, I halved the recipe as well. The full recipe probably yields around 60 cinnamon rolls, don't think my family can finish that much of cinnamon rolls. So half recipe yielded around 30 rolls. Still a lot but trust me, it's just enough for a family of 3-4 coz they're that good.

You can visit Ree's page for step-by-step instructions which are really helpful. I suggest that you have a look at the step-by-step instructions first actually.


The Best and Easiest Cinnamon Rolls Recipe
Adapted from the pioneer woman's recipe

Ingredients:
for the dough:

  • 2 Cups whole milk
  • 1/2 Cup vegetable oil
  • 1/2 Cup sugar
  • 3/4 tbsp instant yeast
  • 4 Cups flour
  • Extra, 1/2 Cups flour
  • 1/2 heaping tsp baking powder
  • 1/2 scant tsp baking soda
  • 1/2 tbsp salt

Filling:

  • 1 Cup melted butter
  • 1 Cup sugar
  • 1/2 Cup cinnamon (or more depending on preference) or chocolate chips ( I made a different batch with chocolate chips. I prefer the cinnamon ones)

Frosting:

  • 1/2 bag Powdered Sugar
  • 2 teaspoons lemon juice
  • 1/4 cups Milk
  • 1/8 cups Melted Butter
  • zest of 1 lemon
  • pinch of Salt

Methods:

  1. Mix the milk, vegetable oil and sugar in a pan. Scald the mixture (heat until just before the boiling point). Turn off heat and leave to cool 45 minutes to 1 hour. When the mixture is lukewarm to warm, but NOT hot, sprinkle in instant yeast. Let this sit for a minute. Then add 4 cups of all-purpose flour. Stir mixture together. Cover and let rise for at least an hour.
  2. After rising for at least an hour, add 1/2 more cup of flour, the baking powder, baking soda and salt. Stir mixture together. (At this point, you could cover the dough and put it in the fridge until you need it – overnight or even a day or two, if necessary. Just keep your eye on it and if it starts to overflow out of the pan, just punch it down. I just let it rise for another hour and the result was beautiful)
  3. When ready to prepare rolls: Sprinkle rolling surface generously with flour. Take half the dough and form a rough rectangle. Then roll the dough thin, maintaining a general rectangular shape. Drizzle 1/2 melted butter over the dough. Now sprinkle 1/2 cup of sugar over the butter followed by a generous sprinkling of cinnamon.
  4. Now, starting at the opposite end, begin rolling the dough in a neat line toward you. Keep the roll relatively tight as you go. Next, pinch the seam of the roll to seal it. Finish up the other half of the dough in a similar way.
  5. Spread 1 tablespoon of melted butter in a seven inch round foil cake or pie pan. Then begin cutting the rolls approximately ¾ to 1 inch thick and laying them in the buttered pans.
  6. Let the rolls rise for 20 to 30 minutes, then bake at 375 degrees farenheit until light golden brown, about 15 to 18 minutes.

For the frosting, mix together all ingredients listed and stir well until smooth. It should be thick but pourable. Taste and adjust as needed. Generously drizzle over the warm rolls.

Tips:

  • The photo below showed the ones I put in the wrong pan. See how they're quite flat in comparison to other batch on top left corner of my first photo where I put in a square pan? So yea, put the rolls in the correct pan.

  • I used instant yeast for this recipe. If you want to use active dry yeast, then just use 1tablespoon of active dry yeast. The proportion for instant:active yeast is approximately = 0.75 : 1. So 1 tablespoon active dry yeast = 3/4 tablespoon instant yeast.

Make these rolls! You won't regret it. Takes no time to prepare, and I assure you you can even get your ironing done while waiting for the dough to rise. =)


Sunday, January 2, 2011

Banana Mixed Berries Muffin


As I mentioned in my previous post, I'm currently in this berry mood. It's summer, and for me when it comes to food I think nothing represents summer better than berries. Sweet, a little sour and refreshing. Mix them with lemonade, and you'll get the best summer punch.

I made these Banana Mixed Berries Muffins yesterday. Had day off from work and I already miss the muffin from Cafe Cornucopia near my work place. I mentioned this cafe on my earlier post. We go there pretty much everyday when we are at work to enjoy our morning tea with a cup of skinny latte and their wonderful scones and muffins. They are all homemade which is what makes them taste so good I believe. It's a very cosy cafe, with a homey familiar ambience. The owners are very friendly and they have been well notified by yours truly that I love and miss the muffins when they were not open for Christmas. =)....They deserve a holiday though, it's a busy small cafe but very good business especially during lunchtime. I highly recommend those going to Ballarat to visit this small little cafe. It's located on Mair Street just opposite Ballarat Base Hospital. Must try their scones and muffins, you won't be disappointed.

Back to this recipe. I love muffin. It's not hard to make and you can create any flavours you like. My favourite muffin from Cafe Cornucopia is their Banana Mixed Berries Muffin hence the reason why I made these. The result was satisfying. The muffins came out perfectly moist and had that crunchy tops. The top didn't stay crunchy when I kept them overnight, however, it stays moist. Anyone has tips on how to make your muffins stay crunchy ? =)......Please leave a comment if you do.

Banana Mixed Berries Muffin

Ingredients:


  • 2 cups all purpose flour
  • 1/2 tsp salt
  • 2 tsp baking powder
  • 8 tbsp unsalted butter (120 g), soften and cubed
  • 1 cup sugar , plus extra to sprinkle on top of muffins
  • 2 large eggs
  • 1/2 cup whole milk
  • 2 cups mixed frozen berries
  • 1 large ripened banana, mashed
Methods:
  1. Heat oven to 190 degree celsius. Grease muffin cups and cut 12 15 x 15cm sized baking paper to line the muffin cups.
  2. Shift together the flour, salt, and baking powder.
  3. Cream the butter and 1 cup sugar in a large bowl, until light. Add the eggs one at a time, beating well after each addition.
  4. Add in milk into the egg mixture then add in the mashed banana
  5. Add all the dry ingredients into the wet ingredients. The key is not to overmix or the muffins will come out hard. So just mix lightly, I used two spatulas and lift the dough from bottom up. It's okay to have lump in there. The batter doesn't have to be smooth.

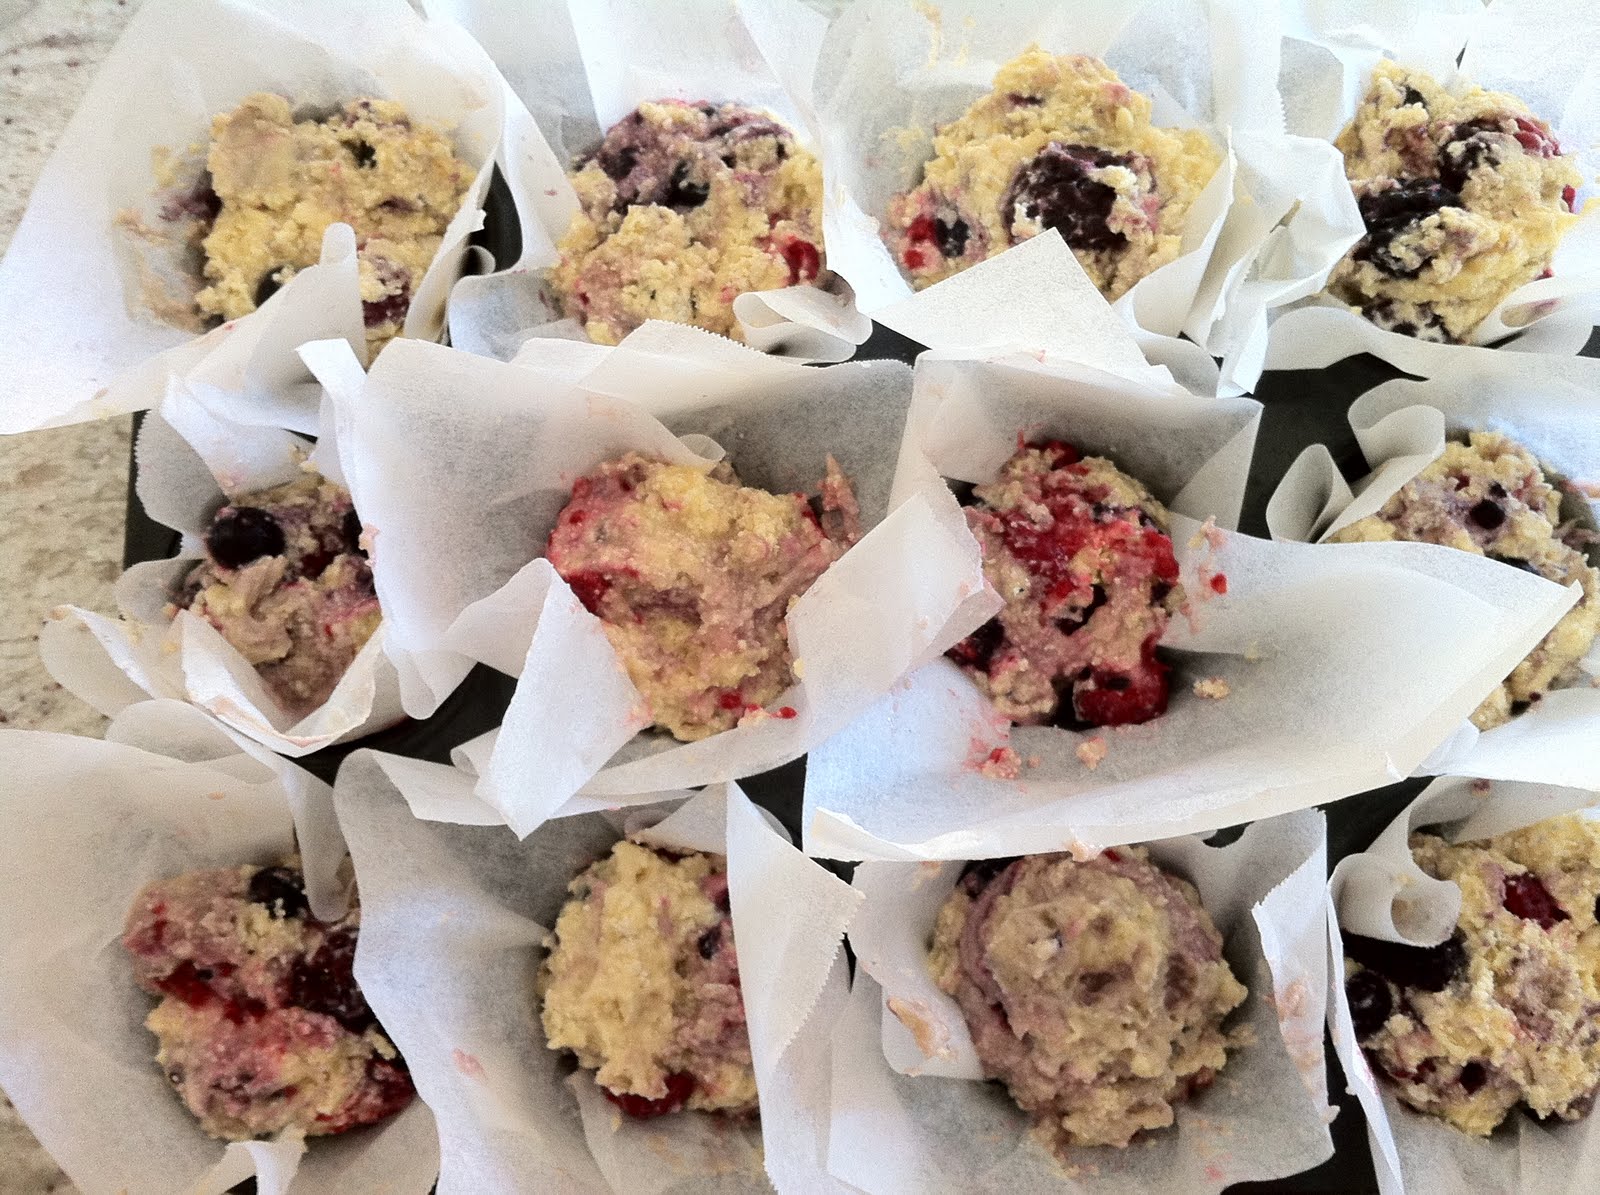
6. Add in the frozen berries and again, mix lightly

All the lumpy goodness ready to fill the muffin cups

7. Fill the muffin cups with batter. Sprinkle the remaining tablespoon of sugar over the tops of
muffins.


8. Bake until a toothpick inserted in the center comes out clean, about 30 minutes.

Fresh from oven, moist inside and crunchy on top. Mmmm...yumm..


9. Cool for 30 minutes before removing from the pan.

I can't help but have one immediately. Satisfied from my craving. Happy Leny!


Monday, December 6, 2010

Sundried Tomato and Cheese Scone


My first post for this blog. Wow, how do I start? Why do I want to start a blog?
Mainly because I was inspired by my sister from mydatewithfood. Please visit her blog too if you have time, it's filled with warm home-cooked meals and great Sydney restaurant reviews.

Besides that Im actually a food addict. I can't stop thinking about food. It's crazy I know. I should be thinking more about work or family or even exercise ( mmmmm not really) than food. But oh well, I just love food. I love making them, I love looking at them ( esp the ones from donna hay magazine, don't they just look so pweeetyyyy??), I love eating them. My love of food probably comes from my family too. My mom loves to cook, my sister and brother love to cook, my father loves to eat, my mom in law loves to cook , well you get my point now I guess, and of course my husband loves to eat too. I would love to think he loves to eat the food I cook.

Hm, how do I start with my first post. I made these scones last weekend because I am currently completely addicted and in love with a cafe that sells great scones near my workplace. They made wonderful sundried tomato and cheese, date and walnut, cheese and chives scones. Not to forget their wonderful berry and plum muffins too. This cafe is called cornucopia, don't ask me what it means because I have nooooo idea what it means too. But it's run by two lovely owners who bake their own muffins and scones every morning. I always stop by in the morning to get my morning skinny latte with 1.5 sugar ( quite particular ha? could've just put 1 or 2 sugars, but it just has to be 1.5 for me ehehehe). And we'll always drop by for morning tea to get our second dose of caffeine with some fresh muffin and scone.

I used the basic scone recipe from masterchef. Surprisingly Gary's scones don't have butter in it. But it's pretty simple to make. The key is really not to overmix the dough or else you'll get stones not scones. It's really quick to make. I made these at 6.45am and get fresh scones by 7.30am.
So here we go. ( PS: please pardon the photos. I have to get the USB cable for my camera, so I have to use my phone in the mean time).

Sundried Tomato and Cheddar Cheese Scone
Ingredients:
  • 150mls milk ( full cream is best, but I use skinny)
  • 150mls cream
  • 1 egg
  • 3 cups self raising flour
  • 1/2 teaspoon salt
  • 1/2 cup sundried tomatoes ( chopped)
  • 1 cup grated cheddar cheese
  • 1 tablespoon dill or any herbs you like ( optional )

Makes 12
1. Preheat oven 200°C fan forced. Line large flat oven tray with baking paper.
2. Whisk 150ml milk, cream and egg together until well combined. Combine flour, salt, sundried tomatoes, dill and cheese in a large bowl. Add milk mixture and stir gently to a soft dough. Turn onto a lightly floured surface and knead gently until dough comes together.
3. Press dough out to 2cm-thick. Cut scones from dough and place onto tray flat-side up. Press dough together gently and repeat using the remaining dough. Brush the tops with milk. Bake 12-15 minutes until golden and well risen. Serve hot with salted butter.

Tips:

  • Most important not to overmix the dough. Just work with it gently.
  • You can also cut the dough to 8 triangles. It actually looks quite nice that way too.
  • If you don't have self raising flour, you can use plain flour but you will need to add baking powder to it.