The dining table is the heart of a home

Monday, January 3, 2011

Sausage and Luncheon Meat/Spam Fried Rice


Conversation:

Me: Dear dear, what do you want to eat for dinner tonight?
Hubby: Anything, I am OK with anything.


That's the usual answer when I ask my husband what he wants for dinner. =)....My hubby is pretty happy to eat whatever I cook.....But yesterday when I asked him the same question again ( I never seem to tire from asking him what he wants to eat hahaha)....He actually said that he felt like having fried rice.


Of course I was more than happy to cook fried rice for him too. I always love fried rice. It's one of those dishes you can just put anything you want, chuck in any left over vegies/meat you have in the freezer. I made sausage / luncheon meat fried rice yesterday. And the result was satisfying. He loved it.


For me, the key thing about fried rice will be to have enough heat for your wok and scramble the eggs before adding the rice. If you add the eggs after adding the rice you'll end up with soggy wet fried rice which is not very nice at all.


The one important ingredient in my fried rice will be fried shallots. It just gives that nice fragrant to the whole dish. You can get them in asian groceries or even make them yourself by thinly slicing red shallots ( the small ones) and deep fry until golden brown. But just to be mindful that there's rumour going around saying manufacturers put plastic into the oil they use to fry the shallots to make them crispy for longer. I don't know how true that is but well that's the rumour. I am fortunate enough to have ongoing supply from my mother in law who prepares them whenever she's coming to Melbourne from Malaysia. Both my mom and mom in law are great cooks who always prepare food/special spice paste whenever they come. So we are indeed very blessed....;)


So hope you enjoy this recipe too. Simple, easy and tasty at the same time. Feel free to adjust seasoning as you go.


Sausage and Luncheon Meat/Spam Fried Rice

Ingredients:


  • 3 cups cooked rice ( overnight rice is preferable)


  • 4 cloves garlic, finely chopped


  • 2 large eggs


  • 1/2 cup frozen vegies


  • 1/4 cup diced canned pineapples


  • 1 sausage ( frankfurt) sliced to 1/2cm thickness


  • 1/2 cup diced lunchen meat or spam


  • 1/4 cup fried shallots


  • A handful of chopped spring onions


Toppings:

  • Lettuce leaves, finely shredded


  • Cucumber and tomato , sliced


Seasonings:

  • 2 tablespoons light soy sauce


  • 3 tablespoons thick soy sauce ( I used ABC kecap manis)


  • 2 tablespoons sesame oil


  • 1/2 teaspoon salt


  • Ground white pepper
Methods:

  1. Heat up oil in frying pan and brown the diced luncheon meat and sausage. Set aside.


  2. Heat up oil in a wok. Add in chopped garlic and fry until fragrant


  3. Add in the eggs and scramble until cooked


  4. Once the eggs are cooked, add in frozen vegetables. Stir fry for few minutes


  5. Add in cooked rice. Stir until the rice is well combined with the vegetables


  6. Add in pineapple pieces, browned sausages and luncheon meat


  7. Put in all the ingredients for seasoning and mix until well combined. You can adjust the seasoning according to your liking. Add a bit more kecap manis/ light soy sauce if need be


  8. Once the seasoning has been mixed well with the rice, add in fried shallots and chopped spring onion and cook for few more minutes.


  9. Decorate your plate with sliced cucumbers and tomatoes. Put the rice at the side and top with lettuce and more fried shallots ( now you really know that I love fried shallots ei?)

So what's your favourite combination of ingredients for fried rice? Feel free to share so that I have new ideas for my next batch of fried rice. Enjoy your week!!

Sunday, January 2, 2011

Banana Mixed Berries Muffin


As I mentioned in my previous post, I'm currently in this berry mood. It's summer, and for me when it comes to food I think nothing represents summer better than berries. Sweet, a little sour and refreshing. Mix them with lemonade, and you'll get the best summer punch.

I made these Banana Mixed Berries Muffins yesterday. Had day off from work and I already miss the muffin from Cafe Cornucopia near my work place. I mentioned this cafe on my earlier post. We go there pretty much everyday when we are at work to enjoy our morning tea with a cup of skinny latte and their wonderful scones and muffins. They are all homemade which is what makes them taste so good I believe. It's a very cosy cafe, with a homey familiar ambience. The owners are very friendly and they have been well notified by yours truly that I love and miss the muffins when they were not open for Christmas. =)....They deserve a holiday though, it's a busy small cafe but very good business especially during lunchtime. I highly recommend those going to Ballarat to visit this small little cafe. It's located on Mair Street just opposite Ballarat Base Hospital. Must try their scones and muffins, you won't be disappointed.

Back to this recipe. I love muffin. It's not hard to make and you can create any flavours you like. My favourite muffin from Cafe Cornucopia is their Banana Mixed Berries Muffin hence the reason why I made these. The result was satisfying. The muffins came out perfectly moist and had that crunchy tops. The top didn't stay crunchy when I kept them overnight, however, it stays moist. Anyone has tips on how to make your muffins stay crunchy ? =)......Please leave a comment if you do.

Banana Mixed Berries Muffin

Ingredients:


  • 2 cups all purpose flour
  • 1/2 tsp salt
  • 2 tsp baking powder
  • 8 tbsp unsalted butter (120 g), soften and cubed
  • 1 cup sugar , plus extra to sprinkle on top of muffins
  • 2 large eggs
  • 1/2 cup whole milk
  • 2 cups mixed frozen berries
  • 1 large ripened banana, mashed
Methods:
  1. Heat oven to 190 degree celsius. Grease muffin cups and cut 12 15 x 15cm sized baking paper to line the muffin cups.
  2. Shift together the flour, salt, and baking powder.
  3. Cream the butter and 1 cup sugar in a large bowl, until light. Add the eggs one at a time, beating well after each addition.
  4. Add in milk into the egg mixture then add in the mashed banana
  5. Add all the dry ingredients into the wet ingredients. The key is not to overmix or the muffins will come out hard. So just mix lightly, I used two spatulas and lift the dough from bottom up. It's okay to have lump in there. The batter doesn't have to be smooth.

6. Add in the frozen berries and again, mix lightly

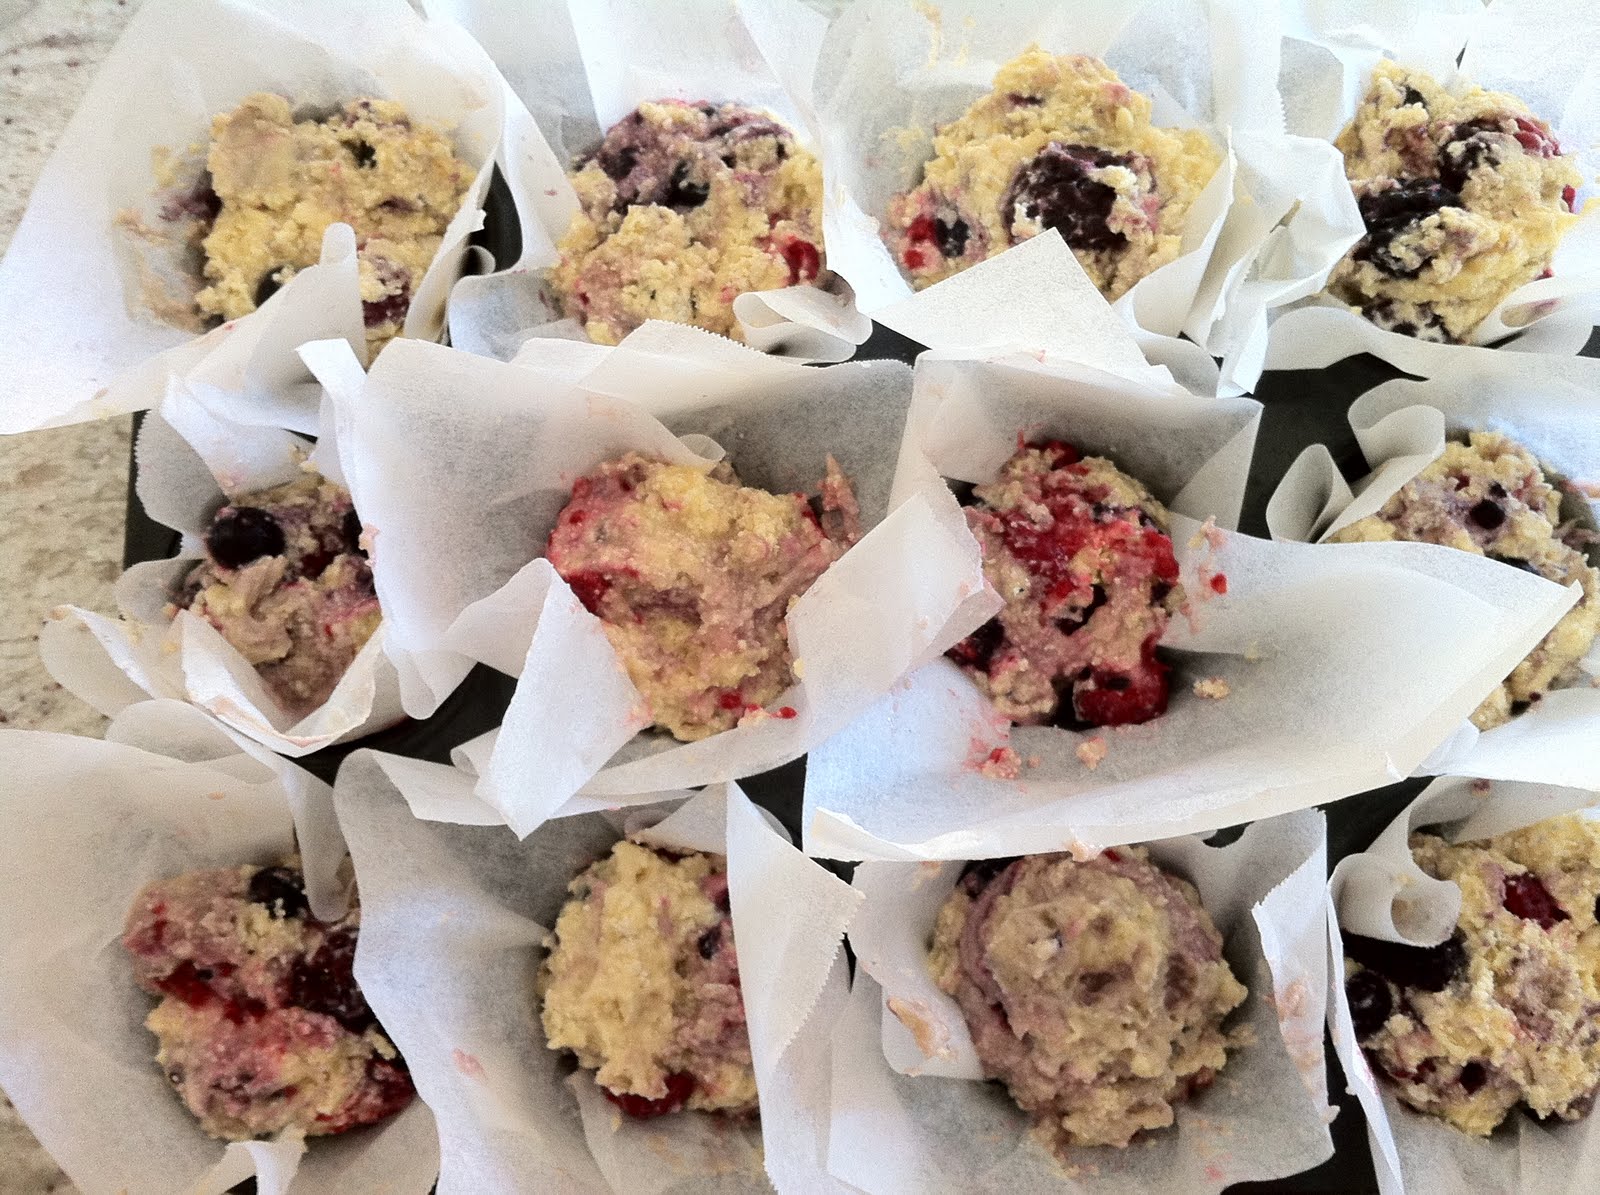
All the lumpy goodness ready to fill the muffin cups

7. Fill the muffin cups with batter. Sprinkle the remaining tablespoon of sugar over the tops of
muffins.


8. Bake until a toothpick inserted in the center comes out clean, about 30 minutes.

Fresh from oven, moist inside and crunchy on top. Mmmm...yumm..


9. Cool for 30 minutes before removing from the pan.

I can't help but have one immediately. Satisfied from my craving. Happy Leny!


Saturday, January 1, 2011

Mixed Berries Ice Cream


My father and mother in law have just left Melbourne today. Feeling a bit sad as the house becomes quiet. We always love it when they visit, it's so much fun. From shopping, to baking, cooking, and playing mahjong together. I love the atmosphere of family being together. But it's okay, they will be here again for Chinese New Year so something to look forward to. =)


That aside, Our family has a deep love and affection for ice cream. We would normally stock 2 1liter tubs of ice cream in our freezer. Given the opportunity I think we would love to have ice cream everyday but of course it's not good for health to have it everyday. I don't believe in deprivation, I think everything in moderation is okay. So we try to limit our consumption to few times a week.

My dear hubby bought me a kitchenaid mixer with the ice cream bowl attachment last year. Since then I have been experimenting with ice cream making. I made this mixed berries ice cream yesterday. The taste is really good, but it's a little icy when it's just taken out of the freezer. The texture is perfect around 5-10mins after it's been taken out of the freezer. Creamy, sweet and tangy all at the same time.

I think I know the reason why it's a bit icy. I suspect it's because I did not reduce the berries puree. As fruits have high water content in it, so naturally if you add lots of water to your ice cream mixture you will end up with icy ice cream instead of a creamy one. So I will probably try to cook down my puree a little next time on low-medium fire.

I will also add another egg yolk the next time I make this. Probably will add the extra creaminess to the ice cream.

I got this recipe again from userealbutter, of which she adapted from david lebovitz "The Perfect Scoop". He indeed is the master of ice cream. I used 5 instead of 4 egg yolks and used mixed berries instead of blackberries. And I also used 1 cup whole milk + 2 cups cream instead of using half and half.

Hope you enjoy the recipe.

Mixed Berries Ice Cream
Adapted from The Perfect Scoop by David Lebovitz

Ingredients:


  • 450 grams frozen mixed berries- pureed and then strain through mesh shieve to obtain 1.5cups puree
  • 1 cup full cream milk
  • 1 cup sugar
  • 2 cups heavy cream
  • 5 large egg yolks
  • 1 tbsp fresh lemon juice
  • 1 tablespoon vodka
Methods:
  1. Pour cream into large bowl and set mesh strainer over top. Also prepare a bowl of cold water with ice. This will be used as ice bath later on. The ice bath bowl has to be able to fit the bowl with cream
  2. In separate medium bowl, whisk together egg yolks.
  3. Warm milk and sugar in a medium sized sauce pan
  4. Slowly pour warm milk into the egg yolks, whisking constantly, then scrape the warmed egg yolks back into saucepan. If you don't have kitchen assistant like me, =), it can be quite difficult to pour and whisk the yolk at the same time. I learnt one trick from Masterchef which is to fold a kitchen towel like this, and then put the bowl on top. This will prevent the bowl from moving around while you whisk.

5. Stir mixture constantly over med heat with heatproof spatula, scraping bottom as you stir
until mixture thickens and coats spatula
6. Pour custard through the strainer into the cream and mix well


7. Mix in the puree, lemon juice and vodka


8. Stir until cool over ice bath
9. Chill thoroughly in the fridge for at least 4 hours or overnight. Churn in ice cream maker
as per manufacturer's instructions.


Hope you enjoy this ice cream. Great for summer!

Thursday, December 30, 2010

Homemade Pesto


I love pesto. You can have them with bread, pasta, make them as pizza base, lots of ways to serve pesto.


But my favourite is probably to make bruschetta or have them with bread. And the exciting thing with pesto is you can make different varieties of them. You can make them with almond, walnut, pine nuts, etc. You can even choose the herbs you want. I usually use parsley and basil. But I know some people have made them with coriander, mint, etc. I think that's the most exciting thing about cooking, you can do whatever you want sometimes as long as it suits your tastebuds. Think out of the box and explore your creativity.


I made these quite often for dinner parties at home. It's pretty easy as long as you have food processor. I made these for Christmas Eve dinner. Basically it's just spreading the pesto on a piece of bread and a slice of tomato on top. You can certainly add some bocconcini or other types of cheese as well.


Homemade Pesto

Ingredients:

  • 1 cup flat leaf parsley, chopped
  • 2 cups basil, leaves only loosely packed
  • 1 clove garlic
  • 1/4 cup parmesan cheese
  • 100grams pine nuts, lightly toasted
  • 1/2 cup good quality extra virgin olive oil
  • 3 tablespoons red wine or white wine vinegar
  • 2 tablespoons sugar, more if you have sweet tooth =)
  • pinch of salt and black pepper

Toppings:

  • Tomatoes- sliced to 2-3mm thickness
  • Baguette, slice diagonally around 1/2cm thick.

Methods:

  1. Put all the ingredients in your food processor.

  2. Process all the ingredients but make sure you don't blitz them too finely. It's nicer to have a bit of crunch.

  3. Season and taste your pesto. Add sugar if it's not sweet enough, add a bit more vinegar if it's not sour enough, add a bit of salt if it's not salty enough, add....I'll stop, well I guess you get my point. ;)

  4. Butter one side of the baguette. Toast in oven 200 degrees celcius until the tops are browned and crunchy

  5. Spread the pesto on a slice of bread, top with tomatoes and serve

Tips:

  • You can chop up some extra basil and put on top of the tomato or even add a whole basil leaf.
  • It's great to serve with pasta or grilled salmon too.

Happy New Year everyone. Hope you have a good celebration

Wednesday, December 29, 2010

BEST ROAST POTATOES AND I MEAN BEST!!!


Hmmm....I'm sitting here not having much to do. So I thought I'd share this recipe that I absolutely loveeee and I actually do believe that this is THE BEST ROAST POTATO RECIPE.....for me at least. ;)

I made this for Christmas Eve dinner and it was yummy.

The secret ingredient is PANKO breadcrumbs. You know those Japanese breadcrumbs we use in making tonkatsu etc? You can get it in any Asian groceries.

I did this recipe by accident actually. A couple of months ago I was preparing breadcrumb herb crusted rack of lamb and because I had extra panko breadcrumb mixture, being me, I thought...hmmm...why not try to mix it with the potatoes. And it turned out GREAT!!!....BEST I mean.....well I've said that at least 10 times since the beginning of this post so if I have not convinced you enough to try this recipe....I don't know what can...=)...

So here we go.

THE BEST ROAST POTATOES

Ingredients:
  • 1kg Baby Potatoes
  • 2 tablespoons salted butter
  • 2 tablespoons olive oil
  • 6-8 cloves of garlic, lightly mashed
  • 1 tablespoon plain flour
  • Extra olive oil, to drizzle the potatoes before roasting

Breadcrumb mixture:

  • 1 cup Panko breadcrumbs
  • 2 tablespoon chopped rosemary ( you can use any dried herbs too if you want. Mixed herbs, parsley, dried rosemary, thyme, anything you like)
  • Salt and black pepper

Methods:

  1. Mix all the ingredients for the breadcrumb mixture and set aside
  2. Chop the baby potatoes into big chunks, leave the skin on. It actually tastes better with skin on
  3. Put the potatoes in a pot of cold salted water and bring it to the boil. You will need a lid for the pot, you'll see why in a while
  4. Drain the potatoes when it's cooked/soft
  5. Put the cooked potatoes back to the pot. Chuck in the butter, olive oil, flour, garlic, breadcrumb mixture and season with a bit of salt and pepper. Don't go too heavy with the salt here because remember your breadcrumb mixture is already salted as well. So go easy.
  6. Put the lid on. We're gonna do some exercise for your biceps and triceps next....=)
  7. Once the lid is on, give the pot a goooooddd shake. You can shake it up and down, side to side, shake it all around, whatever you feel like at that moment. Why do we do this? This will mash up some parts of the potatoes and it actually makes it quite fluffy afterwards. But of course, don't overdo it. Or you'll get mashed potatoes instead of roast potatoes.
  8. Take the lid off and give the potatoes/breadcrumbs a good mix. Some of the potatoes will look quite distorted in shape, some of them will have their skins coming off, but that's okay, I like rustic looking food.
  9. Put the potatoes on baking paper lined tray. Drizzle with a bit more olive oil
  10. Roast in 200 degrees celcius oven for 25-30minutes until the potatoes turn golden and crunchy

And you're done. Hope you enjoy it.

Christmas Lunch


We had a great time on Christmas Day. Thanks to everyone to came and made it such a special day. As mentioned earlier we celebrated my brother in law's 21st Birthday as well.

These are some of the photos for the food that we had on that day. Surprisingly was not too difficult/hectic preparing the lunch. All thanks to my colleague who allowed me to have my Christmas Eve off so that I made all the preparations the day before. And of course my husband, mother, father and brother in law who helped out with the preparation as well.

I am going to share a couple of recipes that I prepared for the lunch. As usual and expected from me, too much food. We had left over for dinner the next few days. I didn't mind it though.....as long as everyone had a good time and good meal as well.

The menu for the lunch was:

Entree:

Cheese platter with homemade sweet onion dip

Rice paper roll with hoisin peanut sauce


Sweet and spicy asian style meatballs


Main

Asian style pasta salad


Red wine beef stew


Shepherd's pie


Beverage:

Raspberries cocktail with mint and lime - Sorry didn't get to take the photos for this one

First recipe that I would like to share is my Red Wine Beef Stew. This dish is so versatile that you can serve it any time with ANYTHING. It's great with bread, pasta, mashed potatoes or rice. And it's dead easy to prepare. You just need your slow cooker, or if you want to save time, use your pressure cooker.


Red Wine Beef Stew

Ingredients:
  • 1.5kg Beef Short Ribs ( I did add some cubed chuck steak as well because short ribs take lots of space in the slow cooker and I can't cook big amount with it. Adding chuck steak is okay, but personally I find beef ribs are much more tender)
  • 5 cloves of garlic
  • 1 whole onion, chopped
  • 300gr of bacons, cut into 1/2cm strips
  • 1.5cups red wine
  • Beef stock
  • Bunch of rosemary and thyme
  • 3 pieces of bay leaf
  • 4 tablespoons honey
  • 500gr carrots ( cut into big chunks)
  • Plain flour for dusting and some extra to thicken the sauce at the end
  • Olive oil
  • Salt and pepper to taste
Methods:
  1. Put carrots into your slow cooker or pressure cooker
  2. Dust beef ribs with flour and brown with a little bit of olive oil on both sides in frying pan
  3. Once the beef ribs are browned, put it on top of the carrot in your slow/pressure cooker
  4. In the same pan that you used to brown your beef, put a little bit more of olive oil and chuck in the bacon
  5. Once the bacon is browned and slightly crispy, put in the chopped onion. Cook until the onion is soft.
  6. Then, put the red wine into the same frying pan
  7. Cook for 10 mins until red wine has been reduced slightly
  8. Put the whole mixture into the slow cooker
  9. Top up with beef stock until it covers the top of the beef
  10. Put your herbs ( thyme, rosemary and bay leaf ), garlic and honey into the slow cooker. Mix slightly.
  11. Season with salt and pepper
  12. If you are using slow cooker, cook on high for about 8-10hours. If using pressure cooker, cook on high pressure for about 30 mins
  13. Once its ready, now THIS IS THE MOST IMPORTANT STEP. SKIM OFF THE LAYER OF FAT.
  14. There'll be a layer of oil built up on top of the beef. This is because the ribs have pretty high fat content in it. So take off the layer of fat. I use a meshed skimmer like this one to do the job. It's a great item to have in your kitchen. YOU HAVE TO REMOVE THE LAYER OF OIL, or else you'll feel like you've just drank a whole cup of oil when you eat your stew and it's probably not good for your arteries too. =)
  15. Once that's done, if the sauce is not thick enough, mix a few tablespoons of flour with water and mix it into your stew to thicken it slightly.
  16. Season with more salt/pepper/honey according to your liking
  17. Serve with bread/pasta/rice, whatever you fancy

There you go, my family loves this stew. I hope yours will too.


Another recipe I'm going to share is sweet onion dip to go with crackers/cheese platter.

I got this recipe from userealbutter

Again it's easy to prepare and tastes great.

Sweet Onion Dip

Ingredients:

  • 250grams cream cheese, softened
  • 1 cup mayonnaise ( I used Japanese Mayonnaise just because I like it better..=) )
  • 1 cup Parmesan cheese
  • 1 cup chopped onion
  • 1 tablespoon black pepper
  • 1/2 tablespoon sugar

Method:

  1. Beat the softened cream cheese until smooth
  2. Stir in the mayonnaise, parmesan, onion, black pepper and sugar
  3. Pour the mixture into 4 ramekin dishes
  4. Bake in oven 180 degrees celcius for 35-45 minutes until the tops are browned and bubbly
  5. Serve with crackers.

Serving tips:

  • You can also serve this dip with crostinis and top with smoked salmon/salami.
  • Try making small pancakes and top them with this dip and smoked salmon and a little bit of herbs. Serve it as an entree at your dinner party. Im sure your guests will be impressed.

The last recipe that I'd like to share today is the sweet and spicy asian style meatballs. Well the thing with my cooking is I often don't measure everything exactly. I go by feeling. Or Malaysians/Indonesians like to call it "agak agak". Which means you just put the estimate amount that you think will make the dish tastes good.

People have different threshold for taste and tastebuds anyway that my idea of sweet might not be sweet enough for another person. So the measurements for the sauces in my recipes are according to how I like it, you can always adjust the seasoning based on how you like it yourself.

Sweet and Spicy Asian Style Meatballs

Ingredients:

  • 1kg minced pork
  • 1/2 cup chopped spring onion
  • 1/2 cup chopped coriander
  • 1 cm knob ginger, chopped finely
  • 1 tablespoon tapioca starch
  • 1 small can of water chestnuts, finely diced

Sauce mixture:

  • 5 tablespoons tomato sauce
  • 1 tablespoon sweet chilli sauce ( I used Lingham sweet chilli sauce)
  • 1 tablespoons sugar
  • 1/4 teaspoon salt
  • 1/2 tablespoon chinese wine
  • 1/2 tablespoon sesame oil
  • 1/2 tablespoon white vinegar ( you can use lemon/lime juice instead of vinegar if you want)
  • 1/4 cup water
  • 1 tablespoon cornstarch mixed with water ( to thicken at the end)

Method:

  1. Mix all the ingredients for the meatballs and form into small balls around 2cm diameter
  2. Place the meatballs on baking tray lined with baking paper
  3. Bake in oven for 20-25mins, 200 degrees celcius until cooked through. Set aside.
  4. Mix all the ingredients for the sauce except the cornstarch/water mixture
  5. Heat up a frying pan, put the sauce mixture into the frying pan
  6. Once heated through, put in the cooked meatballs
  7. Thicken the sauce with the cornstarch mixture to coat the meatballs thoroughly
  8. Adjust seasonings according to your liking. You can add more sugar/vinegar if it's not sweet/sour enough.

Tips:

  • You can serve this with rice as well.

Well that's it for now I suppose. Do leave any comments/questions if anything is not clear. If you want any of the other recipes, just leave your email address with your comment and I will email it to you or maybe write up another post for it.

Have a great new year celebration. Happy New Year everyone!!


Sunday, December 26, 2010

MERRY CHRISTMAS EVERYONE

HAVE A MERRY CHRISTMAS AND HAPPY NEW YEAR EVERYONE.

Wish all of you a great year ahead filled with joy and happiness.

I had a blast on Christmas Day, had a great time hosting lunch at home for Christmas and my brother in law's 21st birtday celebration as well. Lots of food, laughter and joy.

Really thank God for a great family. Thank God for my immediate family, my husband and my in-laws. Love allllll of you to bits....

Thank you for a wonderful year, I'm sure more great things are coming in years to come.

Lots of recipes to come so stay tuned.
New posts coming up in the next few days once I get all the photos ready.
In the meantime, enjoy this holiday season, eat till your heart content and drive safe.